- To do so, do the following:
- Deploy a new VM from the rocky server template (not client)
- Name: cis335-g#-s#-fs1
- Choose the new Profile you created as a group.
- Ensure it’s placed in the correct folder and using the correct storage and network.
- It should pull an IP address and DNS settings from your new DHCP server
- Once your new server finishes rebooting, log in at the console
- Find out the IP address of your new server
- On your DNS server, create an A record for your new server called g#s#fs1
- Use dnf to install bind & bind-utils
1dnf install -y bind bind-utils
2systemctl enable named
3systemctl start named
- Switch to the GUI console of your client VM and do the following:
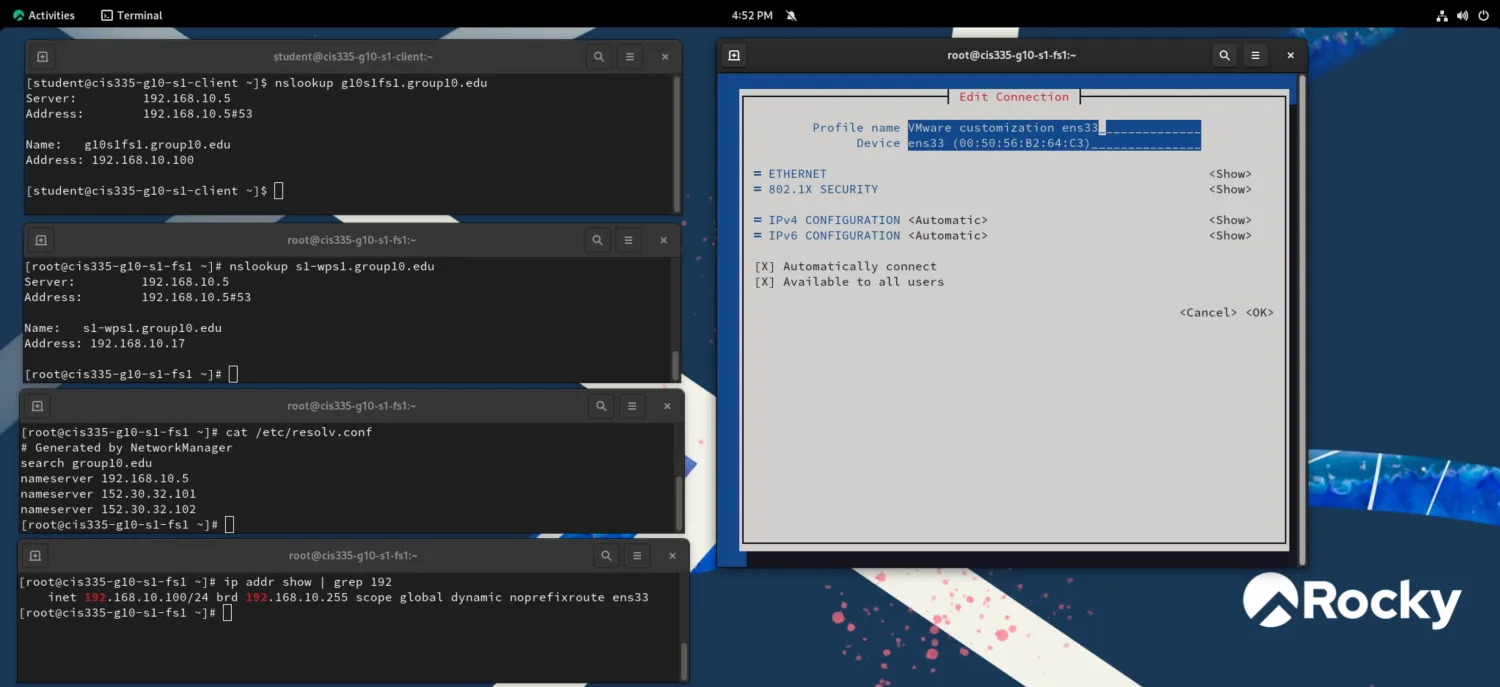
- Open 5 new terminal windows
- Stack terminal windows 1-4 on the left side of your screen.
- Make terminal window 5 larger and place it on the right of your screen.
- In terminals 2-5, ssh as root to your new server using dns name you entered in step 3 above
- In terminal 1 (logged into local client) do an nslookup for your new server via its dns entry.
- In terminal 2, do an nslookup for your web server
- In terminal 3, display the contents of the file located at /etc/resolv.conf
- In terminal 4, run the command: ip addr show | grep ens192
- In terminal 5, launch nmtui, display the Edit a Connection screen for your network connection.
- Take a screenshot, similar to the below except with your settings, of your client with those 5 terminal windows and submit to this assignment.